REST endpoints available
Response codes
Payload structure
Error codes
HTTP methods
Standard error message
Maven
<!-- https://mvnrepository.com/artifact/io.springfox/springfox-swagger-ui -->
<dependency>
    <groupId>io.springfox</groupId>
    <artifactId>springfox-swagger-ui</artifactId>
    <version>3.0.0</version>
</dependency>

<dependency>
  <groupId>io.springfox</groupId>
  <artifactId>springfox-boot-starter</artifactId>
  <version>3.0.0</version>
</dependency>
SecurityConfig.java
@Override
	protected void configure(HttpSecurity http) throws Exception
	{
		http.csrf().disable()
				.exceptionHandling()
				.and()
				.sessionManagement()
				.sessionCreationPolicy(SessionCreationPolicy.STATELESS)
				.and()
				.authorizeHttpRequests()
				.antMatchers(HttpMethod.GET, "/api/v1/**").permitAll()
				.antMatchers("/api/v1/auth/**").permitAll()
				.antMatchers("/v2/api-docs/**").permitAll()
				.antMatchers("/swagger-ui/**").permitAll()
				.antMatchers("/swagger-resources/**").permitAll()
				.antMatchers("/swagger-ui.html").permitAll()
				.antMatchers("/webjars/**").permitAll()
				.anyRequest()
				.authenticated();
		http.addFilterBefore(jwtAuthenticationFilter(), UsernamePasswordAuthenticationFilter.class);
	}
SwaggerConfig
package com.springboot.blog.config;

@Configuration
@EnableSwagger2
public class SwaggerConfig
{
	private ApiInfo apiInfo()
	{
		String description = "Spring Boot Blog REST API Documentation";
		return new ApiInfoBuilder()
				.title("Spring Boot Blog REST APIs")
				.description(description)
				.version("1")
				.termsOfServiceUrl("Terms of service")
				.contact(new Contact("javapp","/javapp.tistory.com","javapp@naver.com"))
				.license("License of API")
				.licenseUrl("API license URL")
				.extensions(Collections.emptyList())
				.build();
	}

	@Bean
	public Docket api()
	{
		return new Docket(DocumentationType.SWAGGER_2)
				.apiInfo(apiInfo())
				.select() // ApiSelectorBuilder 를 생성
				.apis(RequestHandlerSelectors.any()) //api 스펙이 작성되어 있는 패키지 지정
				.paths(PathSelectors.any()) // apis()로 선택되어진 api 중 특정 path 조건에 맞는 api들을 다시 필터링하여 문서화
				.build();
	}
}
http://localhost:8080/v2/api-docs
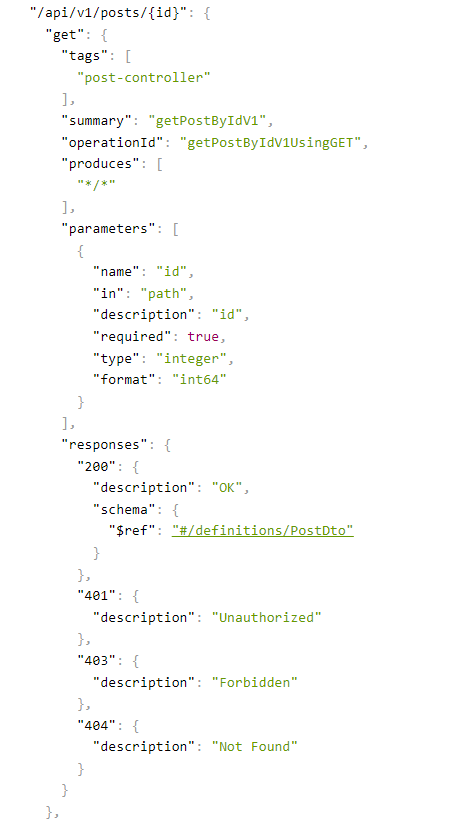
json 문서를 통해서도 확인할 수 있다.
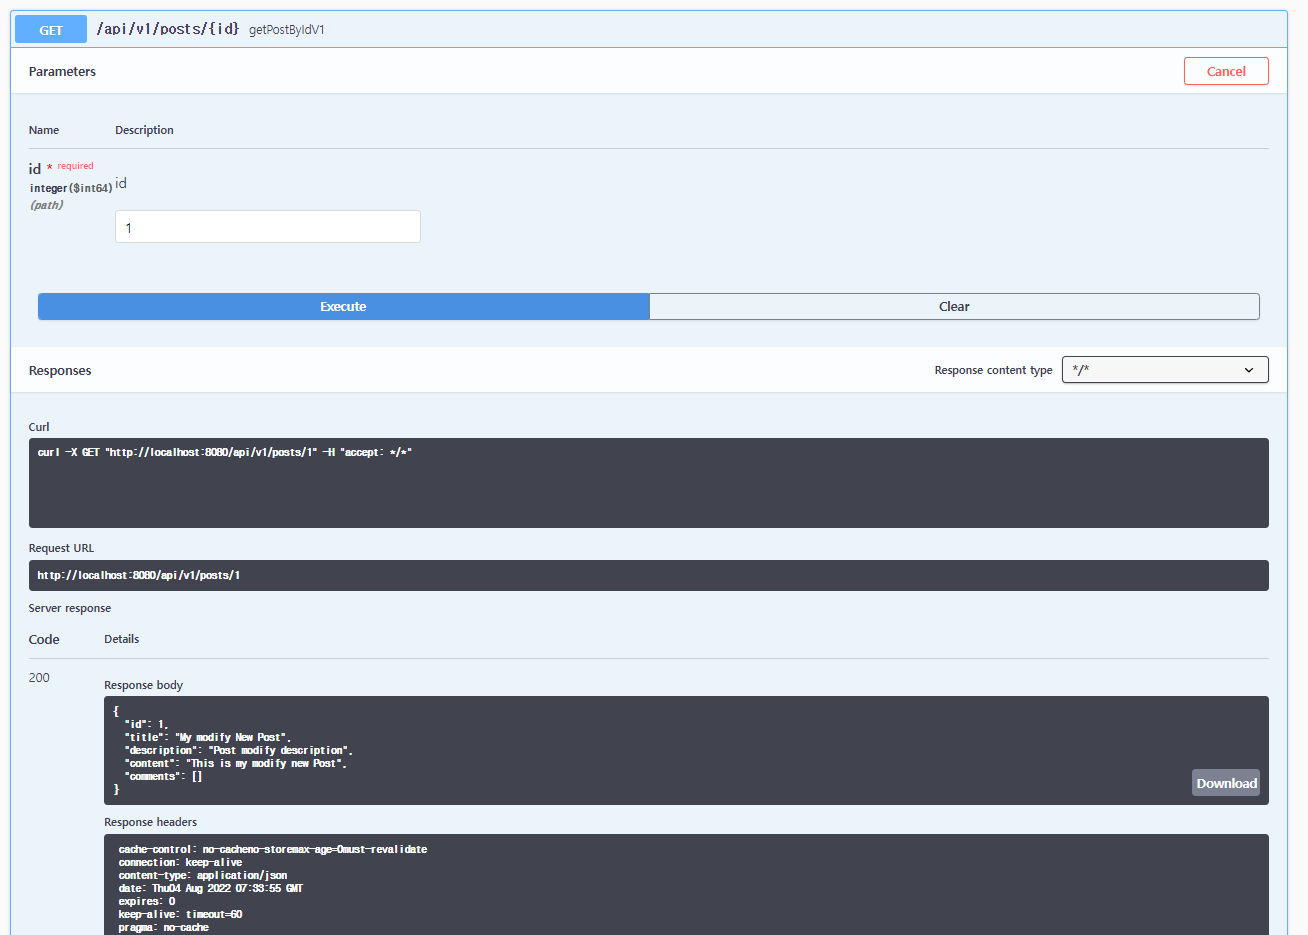
http://localhost:8080/swagger-ui/#/
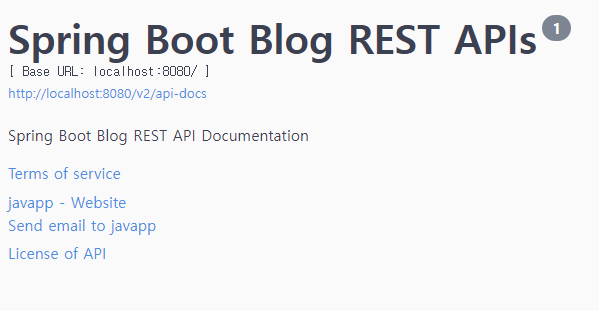
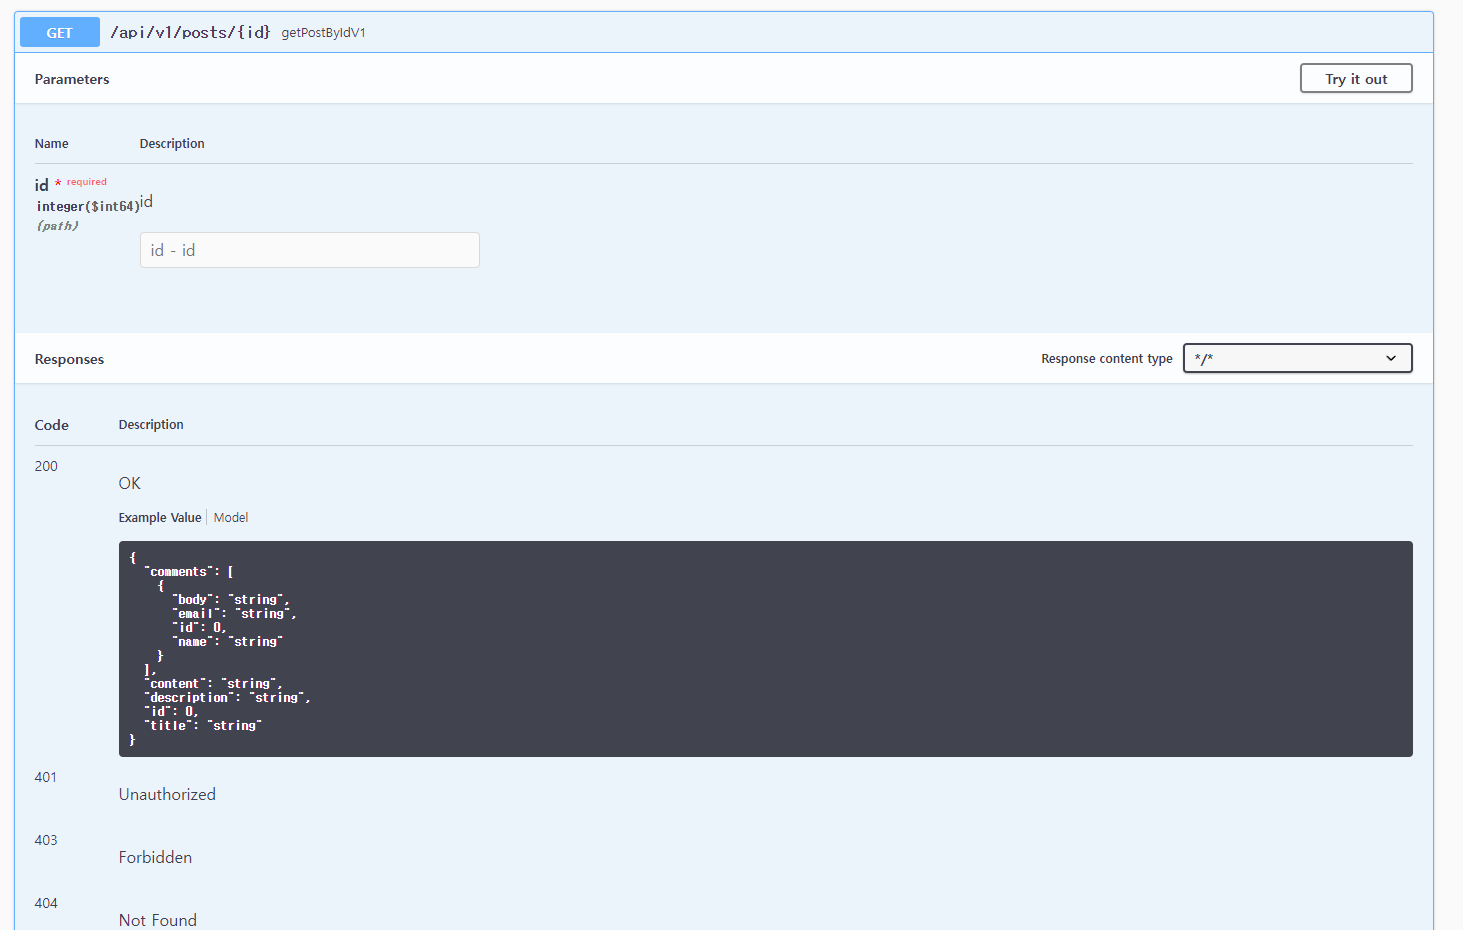
서버가 실행되고 있는 상태에서 확인이 가능해요..
Try it out 으로 직접 값을 넣어 실행할 수 있어요.
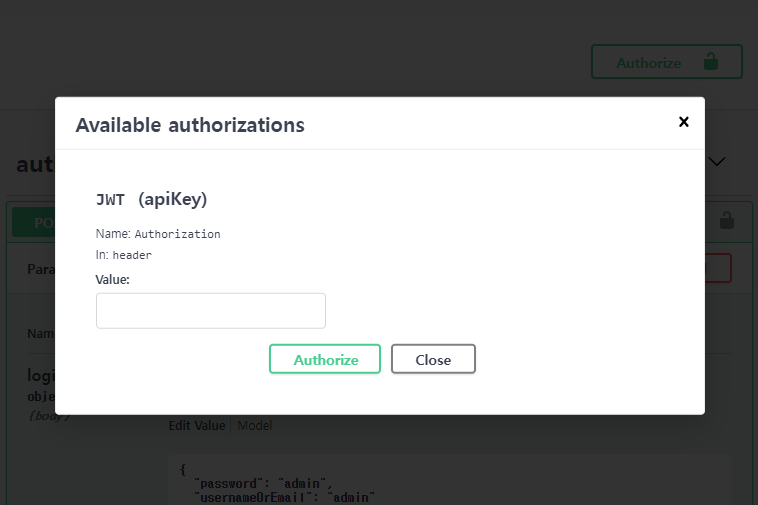
JWT를 포함하기 위한 설정
헤더에 곧바로 JWT를 넣어주려면 몇가지 설정을 해야 합니다.
JWT 인증하지 않고 로그인한 경우

SwaggerConfig.java
package com.springboot.blog.config;

@Configuration
@EnableSwagger2
public class SwaggerConfig
{
	// 헤더의 Authorization 을 통해 JWT를 얻을 수 있다.
	public static final String AUTHORIZATION_HEADER= "Authorization";

	private ApiKey apiKey() {
		return new ApiKey("JWT", AUTHORIZATION_HEADER,"header");
	}

	private ApiInfo apiInfo()
	{
		String description = "Spring Boot Blog REST API Documentation";
		return new ApiInfoBuilder()
				.title("Spring Boot Blog REST APIs")
				.description(description)
				.version("1")
				.termsOfServiceUrl("Terms of service")
				.contact(new Contact("javapp","/javapp.tistory.com","javapp@naver.com"))
				.license("License of API")
				.licenseUrl("API license URL")
				.extensions(Collections.emptyList())
				.build();
	}

	@Bean
	public Docket api()
	{
		return new Docket(DocumentationType.SWAGGER_2)
				.apiInfo(apiInfo())
				.securityContexts(Arrays.asList(securityContext())) //jwt 권한 설정
				.securitySchemes(Arrays.asList(apiKey())) //jwt 권한 설정
				.select() // ApiSelectorBuilder 를 생성
				.apis(RequestHandlerSelectors.any()) //api 스펙이 작성되어 있는 패키지 지정
				.paths(PathSelectors.any()) // apis()로 선택되어진 api 중 특정 path 조건에 맞는 api들을 다시 필터링하여 문서화
				.build();
	}

	private SecurityContext securityContext()
	{
		return SecurityContext.builder()
				.securityReferences(defaultAuth()).build();
	}

	private List<SecurityReference> defaultAuth()
	{
		AuthorizationScope authorizationScope = new AuthorizationScope("global", "accessEverthing");
		AuthorizationScope[] authorizationScopes = new AuthorizationScope[1];
		authorizationScopes[0]= authorizationScope;
		return Arrays.asList(new SecurityReference("JWT", authorizationScopes));
	}

}
Swagger TEST
JWT 인증
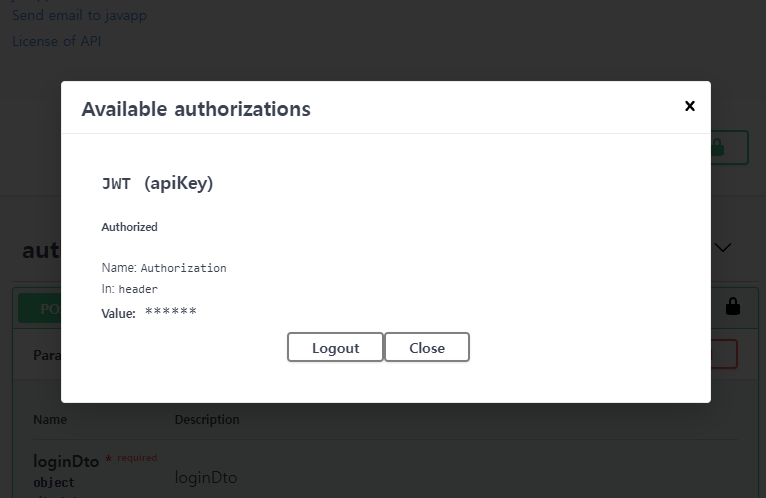
JWT 인증한 이후 로그인한 경우
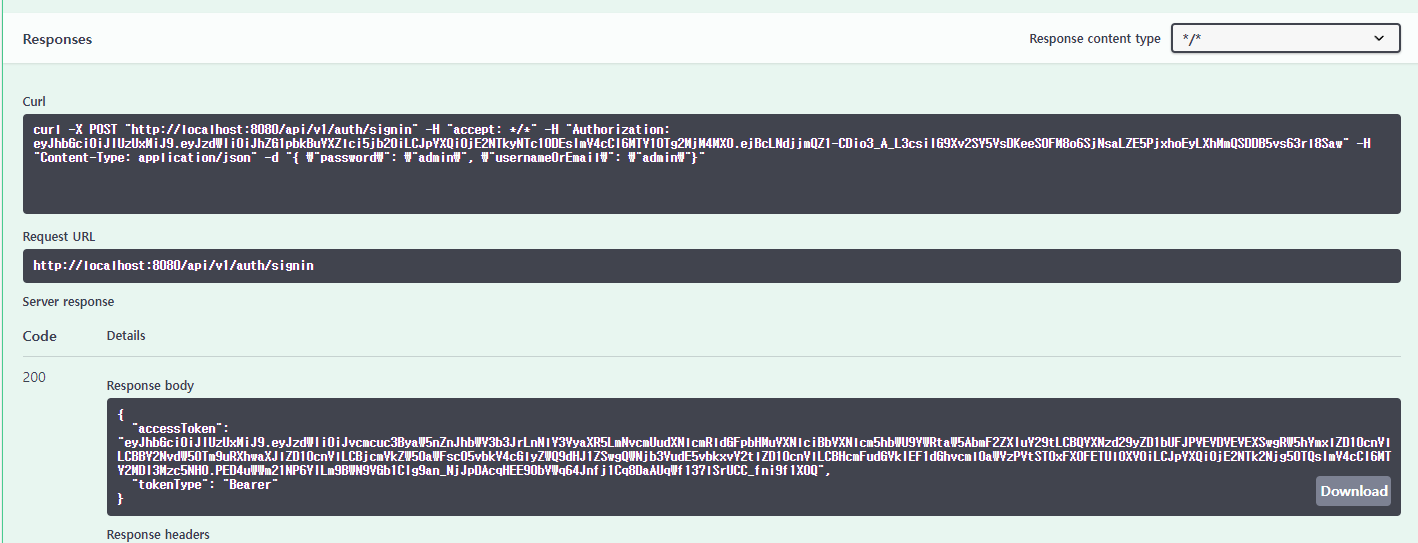
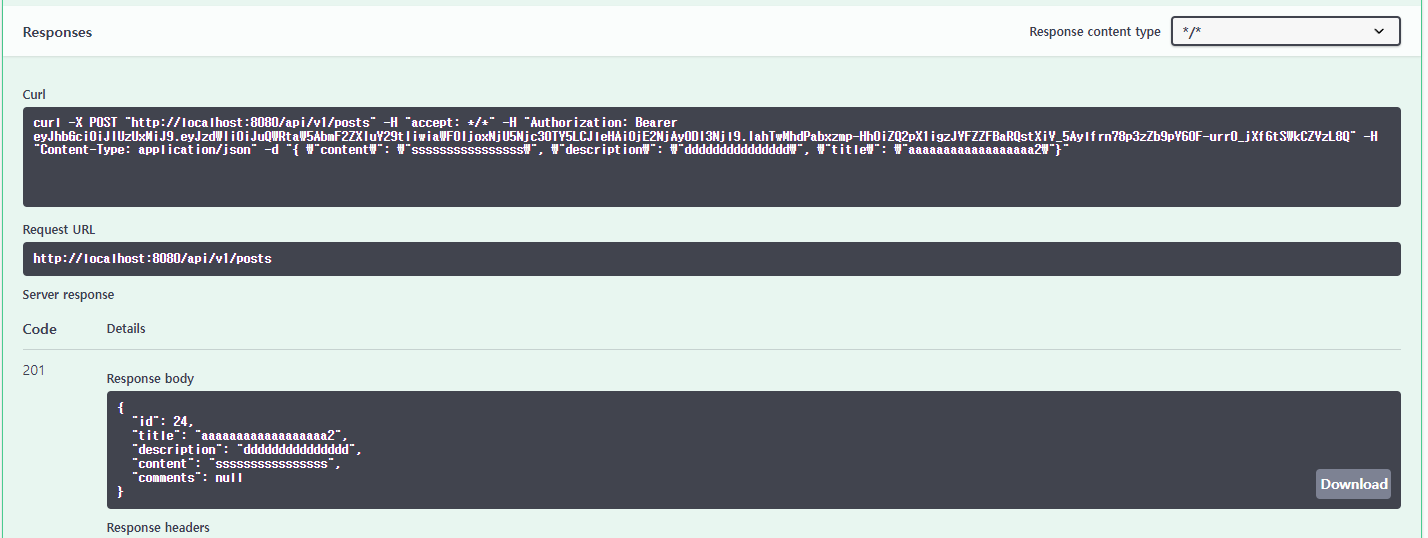
헤더에 "Authorization" 키의 값으로 JWT 토큰이 포함되어 있어요.
JWT 토큰이 필요한 경우의 테스트
	@PostMapping("/api/v1/posts")
	@PreAuthorize("hasRole('ADMIN')")
	public ResponseEntity<PostDto> createPost(@Valid @RequestBody PostDto postDto){
		return new ResponseEntity<>(postService.createPost(postDto),HttpStatus.CREATED);
	}
@PreAuthorize("hasRole('ADMIN')")
이처럼 권한이 있을경우 JWT를 통해 인증이 필요해요.
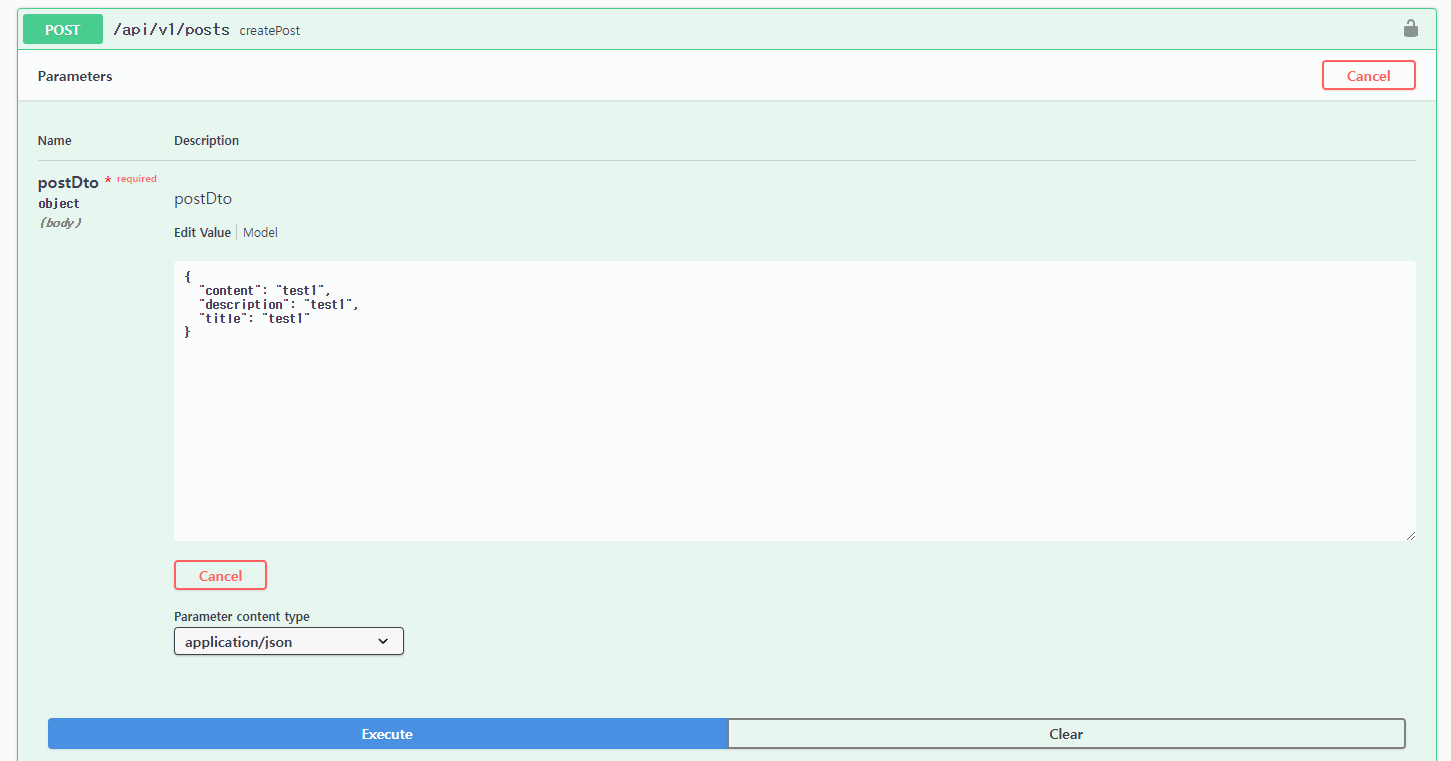
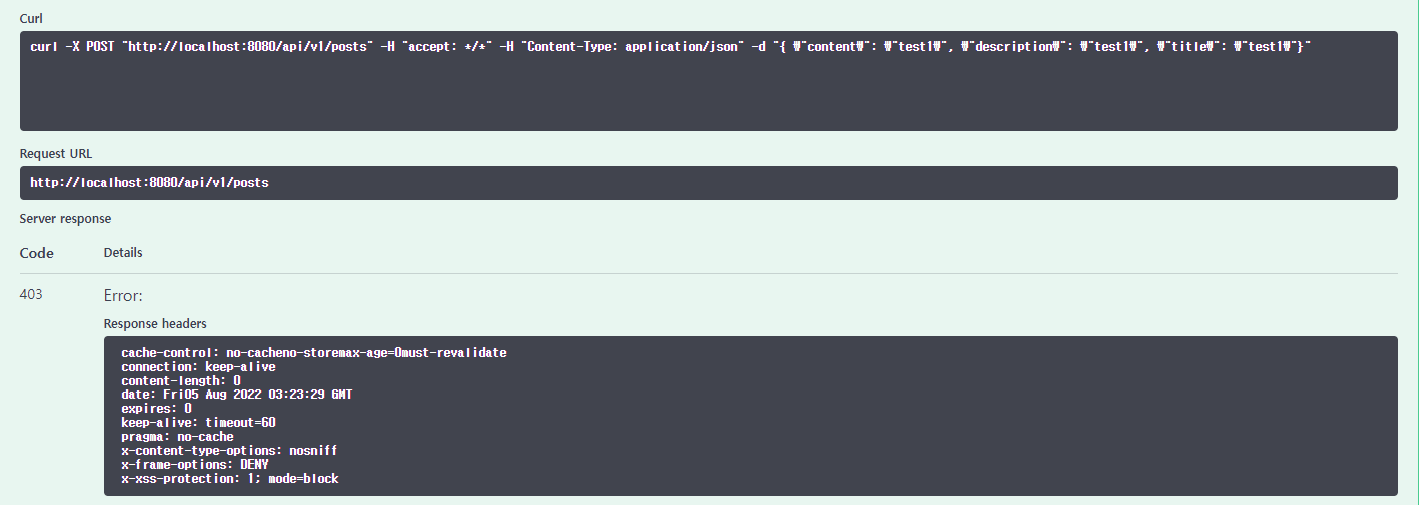
jwt 없이 테스트를 할 경우 페이지로 부터 거부 당하게 돼요.
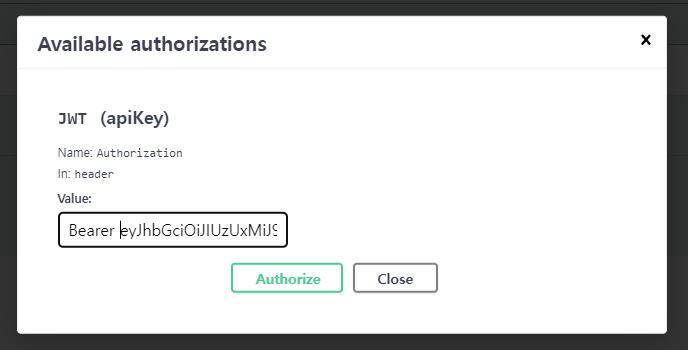
JWT인증시 주의해야될 사항이 있는데
JwtAuthenticationFilter 클래스에서 작성한 메소드에 따라 토큰 값을 변경해주어야해요.
JwtAuthenticationFilter.java
	// Bearer <accessToken>
	private String getJWTfromRequest(HttpServletRequest request)
	{
		String bearerToken = request.getHeader("Authorization");
		if(StringUtils.hasText(bearerToken) && bearerToken.startsWith("Bearer ")) {
			return bearerToken.substring(7, bearerToken.length());
		}
		return null;
}bearerToken.startsWith("Bearer ")
--> 토큰값 앞에 "Bearer " 붙여서 인증
JWT 인증후 포스트 생성 결과
정리해보자면
JwtTokenProvider.java
	public String generateToken(Authentication authentication)
	{
		String username= authentication.getName();
		System.out.println("username: "+ username);

		Date currentDate = new Date();
		Date expireDate= new Date(currentDate.getTime() + jwtExpirationInMs);

		String token = Jwts.builder()
				.setSubject(username)
				.setIssuedAt(new Date())
				.setExpiration(expireDate)
				.signWith(SignatureAlgorithm.HS512, jwtSecret)
				.compact();
		return token;
	}
public String generateToken(Authentication authentication)
{
String username= authentication.getName();
String token = Jwts.builder()
.setSubject(username) // username 으로 등록
return token;
}
: 시큐리티에 인증된 getName()으로 토큰 생성
컨트롤러에서 @PreAuthorize("hasRole('ADMIN')") 권한을 검사
SecurityConfig.java 에서
http.addFilterBefore(jwtAuthenticationFilter(), UsernamePasswordAuthenticationFilter.class);
jwtAuthenticationFilter - doFilterInternal() 메소드를 통해 jwt 검증
	@Override
	protected void doFilterInternal(HttpServletRequest request, HttpServletResponse response, FilterChain filterChain)
			throws ServletException, IOException {

		// get JWT(token) from http request
		String token = getJWTfromRequest(request);

		// validate token
		if(StringUtils.hasText(token) && tokenProvider.validateToken(token))
		{
			// get username from token
			String username= tokenProvider.getUsernameFromJWT(token);
			// load user associated with token
			UserDetails userDetails = customUserDetailsService.loadUserByUsername(username);

			UsernamePasswordAuthenticationToken authenticationToken = new UsernamePasswordAuthenticationToken(
					userDetails, null, userDetails.getAuthorities());
			authenticationToken.setDetails(new  WebAuthenticationDetailsSource().buildDetails(request));

			// set String Security
			SecurityContextHolder.getContext().setAuthentication(authenticationToken);
		}
		filterChain.doFilter(request, response);
	}
UserDetails userDetails = customUserDetailsService.loadUserByUsername(username);
public class CustomUserDetailsService implements UserDetailsService
	@Override
	public UserDetails loadUserByUsername(String usernameOrEmail) throws UsernameNotFoundException {
		System.out.println("usernameOrEmail: "+usernameOrEmail);
		User enUser= userRepository.findByUsernameOrEmail(usernameOrEmail, usernameOrEmail)
					.orElseThrow(()-> new UsernameNotFoundException("User not found with username or email: "+ usernameOrEmail));

		// 시큐리티로 감싸서 반환
		return new org.springframework.security.core.userdetails.User(enUser.getEmail(), enUser.getPassword(), mapRolesToAuthorizities(enUser.getRoles()));
	}
loadUserByUsername() 가 실행되어 usernameOrEmail로 된 UserDetails 을 받아오네요.
출력
usernameOrEmail: nAdmin@naver.com
애노테이션을 통해 Swagger REST 문서 커스터마이징
https://github.com/swagger-api/swagger-core/wiki/Annotations
GitHub - swagger-api/swagger-core: Examples and server integrations for generating the Swagger API Specification, which enables
Examples and server integrations for generating the Swagger API Specification, which enables easy access to your REST API - GitHub - swagger-api/swagger-core: Examples and server integrations for g...
github.com
Name Description
| @Api | Marks a class as a Swagger resource. |
| @ApiImplicitParam | Represents a single parameter in an API Operation. |
| @ApiImplicitParams | A wrapper to allow a list of multiple ApiImplicitParam objects. |
| @ApiModel | Provides additional information about Swagger models. |
| @ApiModelProperty | Adds and manipulates data of a model property. |
| @ApiOperation | Describes an operation or typically a HTTP method against a specific path. |
| @ApiParam | Adds additional meta-data for operation parameters. |
| @ApiResponse | Describes a possible response of an operation. |
| @ApiResponses | A wrapper to allow a list of multiple ApiResponse objects. |
| @Authorization | Declares an authorization scheme to be used on a resource or an operation. |
| @AuthorizationScope | Describes an OAuth2 authorization scope. |
@Api
Swagger resource API 선언, @Api 주석 달린 클래스만 스웨거에서 스캔됩니다.
AuthController.java
@Api(value= "Auth controller exposes sinin and signup Rest APIs")
@RestController
@RequestMapping("/api/v1/auth")
public class AuthController
{
	..
@ApiOperation will be scanned and added the API Declaration.
@ApiOperation(value="REST API to Register or Signup user to Blog app",
httpMethod="POST")
@PostMapping("/signin")
public ResponseEntity<JWTAuthResponse> authnticateUser(@RequestBody LoginDto loginDto)
{
	...

@ApiOperation(value="REST API to Signin or Login user to Blog app")
@PostMapping("/signup")
public ResponseEntity<?> registerUser(@RequestBody SignUpDto signUpDto)
{
	...

Swagger UI 에서 각 메소드에
@ApiOperation (value= .. ) 설정한 value를 확인할 수 있다.
이 애노테이션을 통해 프론엔드개발자와 소통이 가능할 것 같다.
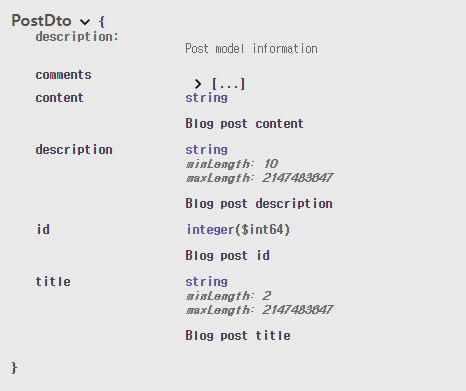
Model
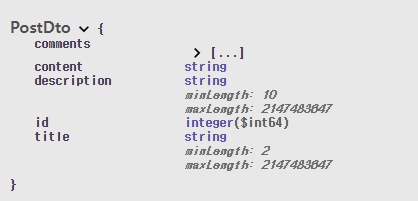
@ApiMode에 대한 추가 정보 제공
@ApiModelProperty 속성에 대한 data 추가
@ApiModel(description = "Post model information")
@Data
public class PostDto
{
	@ApiModelProperty(value="Blog post id")
	private long id;

	@ApiModelProperty(value= "Blog post title")
	@NotEmpty
	@Size(min =2, message="Post title should have at least 2 characters")
	private String title;

	@ApiModelProperty(value= "Blog post description")
	@NotEmpty
	@Size(min= 10, message="Post description should have at 10 characters")
	private String description;

	@ApiModelProperty(value= "Blog post content")
	@NotEmpty
	private String content;

	private Set<CommentDto> comments;
}
'Back-end > Spring Boot + REST API' 카테고리의 다른 글
| Spring Boot 실행 프로세스와 Embedded Servers , CLI 실행 (0) | 2022.09.09 |
|---|---|
| Spring boot - blog application (REST API) : AWS RDS, Elastic Beanstalk (0) | 2022.09.08 |
| Spring boot - blog application (REST API) : Versioning (버저닝) (0) | 2022.08.04 |
| Spring boot - blog application (REST API) : Spring Security + JWT (0) | 2022.08.02 |
| Spring boot - blog application (REST API) : Securing REST APIs (0) | 2022.07.20 |


댓글